Blog is moved to a new location!

My blog is moved to a new location.
From now on you will find all the old posts both on https://eelzinga.wordpress.com and http://blog.xenta.nl/

The new posts will only get added to http://blog.xenta.nl

Post new comments on the new blog location!

Hope you will enjoy the new site!

Scheduling Oracle SOA Suite Composite Applications (or whatever you want) in Weblogic

After reading a nice article about TimerManager functionality in Weblogic, i wanted to see how easy it would be to schedule my test composite application.

First deploy your composite and go to SOA > soa-infra > default > Test > WSDL.
Copy/paste the wsdl, this one we will use to generate the web proxy.
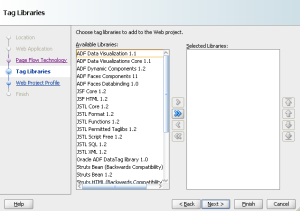
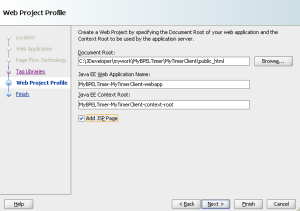
Back in JDeveloper create a new Application (or add it to an existing one), and create a new Web Project.

Select the jsp option, we will use this page later to trigger the scheduler.

Generating the Web Proxy

Right mouseclick on the Project > New > Business Tier > Web Services > Web Service Proxy


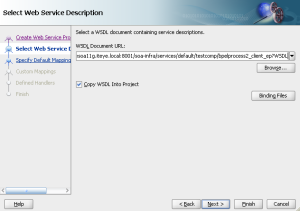
Fill in the url which we copy/pasted from the Test console of the composite application.


Fill in your package structure


We only have a synchronious service call


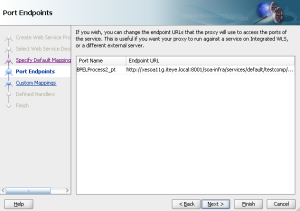
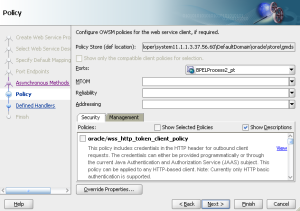
Here we have the option to apply any policies

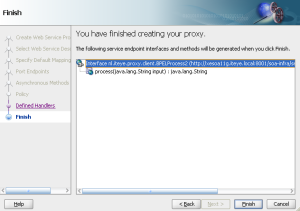
This will generate all the code we need to invoke the composite application (wsdl).
The class with the name ending with ‘_ptClient’ contains all the code needed to do the invoke from java. This we will reuse later on.
For a little test, change the code so it calls the correct method of your composite application and check the console to see if it triggers a new instance.
Now we know for sure the proxy code itself is working, so we can go on with the code to schedule the invoke.

TimerManager

The code of the TimerManager i borrowed from this excellent blog.
Create both ‘TimerServlet’ servlet and the ‘TimerListener’ class, edit web.xml, and add link to the servlet to the index.jsp which we generated in one of the earlier steps.

Now copy/paste the example code of the ‘_ptClient’ class to the ‘TimerListener’ class, and select the method you want to call (in my case the ‘process’ method).

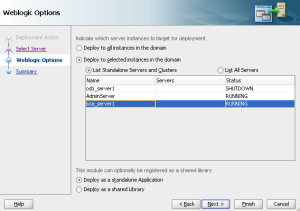
Deploy and Run

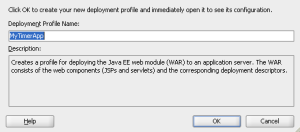
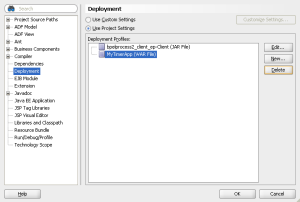
Add a new WAR File Deployment Profile to the project.
Right mouseclick on the Project > Deploy > MyTimerApp and either select to deploy right away to the Application Server or to a local WAR archive.

Go to the url of the index.jsp to trigger the scheduler, for example http://localhost:8001/MyBPELTimer-MyTimerClient-context-root/index.jsp

Console output

inside timerExpired()
Starting schedule bpel, Fri May 21 12:25:03 CEST 2010
Finishing schedule bpel, response is : setOutput
exiting timerExpired()

inside timerExpired()
Starting schedule bpel, Fri May 21 12:25:13 CEST 2010
Finishing schedule bpel, response is : setOutput
exiting timerExpired()

inside timerExpired()
Starting schedule bpel, Fri May 21 12:25:23 CEST 2010
Finishing schedule bpel, response is : setOutput
exiting timerExpired()

Overview of the Composite instances which were created

Resources

http://weblogic-wonders.com/weblogic/2010/05/02/weblogic-timermanager-for-scheduling-tasks/
http://blogs.oracle.com/jamesbayer/2009/04/a_simple_job_scheduler_example.html

Download

JDeveloper Project – It includes the generated code/imports against my own composite application. Regenerate the code against your own wsdl, and revalidate the code.

Oracle SOA Suite 11g, Resequence messages in Mediator

“A Resequencer is used to rearrange a stream of related but out-of-sequence messages back into order. It sequences the incoming messages that arrive in a random order and then send them to the target services in an orderly manner. The sequencing is done based on the sequencing strategy selected.”

For the resequencer to work we need to have 2 values in the source payload. The first one is a sequenceID, and the next one is a groupdID. The sequenceID will be used as identifier for the message itself. The groupID will be used to group the messages in which the resequencer will rearrange the messages based on the sequenceID. Different groups will have seperate processing, so they won’t have any influence on each other.

The mediator supplies us 3 types of resequencers :

  • Standard Resequencer
  • FIFO Resequencer
  • BestEffort Resequencer

Let’s test the first one.

For this i created the next composite

In here i just map the input of the process 1on1 to the File adapter, which will store the input of the process on filesystem.

Interface of the composite

<?xml version="1.0" encoding="UTF-8"?> 
<schema attributeFormDefault="unqualified"
	elementFormDefault="qualified"
	targetNamespace="http://xmlns.oracle.com/Application1_jws/MyReSequence/ProcessEmployees"
	xmlns="http://www.w3.org/2001/XMLSchema">
	<element name="process">
		<complexType>
			<sequence>
				<element name="empID" type="string"/>
        <element name="empType" type="string"/>
        <element name="empName" type="string"/>
			</sequence>
		</complexType>
	</element>
	<element name="processResponse">
		<complexType>
			<sequence>
				<element name="result" type="string"/>
			</sequence>
		</complexType>
	</element>
</schema>

Configuration of the sequencer

Doubeclick the mediator component in the composite.

For the Resequence Level we can select ‘operations’ or ‘component’.
For Mediator components which only have 1 operation it doesn’t matter which one we select. For a Mediator component which consists of more then 1 operation and selecting the ‘component’ option means resequencing is applied to all operations in it. For this test we selected the ‘component’ option and used the ‘Standard’ mode.
Now we have several options to configurate the resequencer.

  • Group – xpath expression to the field in the payload which the resequencer will use to group our incoming messages
  • ID – xpath expression to the field which will uniquely identify our message
  • Start – Start value of the ID in the incoming message
  • Increment – Value which will be used for the increment of the id field in the upcoming messages
  • Timeout – Time to wait before a following expected message arrives at the Mediator component

And that’s it what is needed for the configuration of the ‘Standard’ resequencer.

Test

To test this scenario i will use the following 3 messages.

<soap:Envelope xmlns:soap="http://schemas.xmlsoap.org/soap/envelope/">
    	<soap:Body xmlns:ns1="http://xmlns.oracle.com/Application1_jws/MyReSequence/ProcessEmployees">
        		<ns1:process>
            			<ns1:empID>1</ns1:empID>
            			<ns1:empType>IT</ns1:empType>
            			<ns1:empName>Eric</ns1:empName>
        </ns1:process>
    </soap:Body>
</soap:Envelope>
<soap:Envelope xmlns:soap="http://schemas.xmlsoap.org/soap/envelope/">
    	<soap:Body xmlns:ns1="http://xmlns.oracle.com/Application1_jws/MyReSequence/ProcessEmployees">
        		<ns1:process>
            			<ns1:empID>2</ns1:empID>
            			<ns1:empType>IT</ns1:empType>
            			<ns1:empName>John</ns1:empName>
        </ns1:process>
    </soap:Body>
</soap:Envelope>
<soap:Envelope xmlns:soap="http://schemas.xmlsoap.org/soap/envelope/">
    	<soap:Body xmlns:ns1="http://xmlns.oracle.com/Application1_jws/MyReSequence/ProcessEmployees">
        		<ns1:process>
            			<ns1:empID>3</ns1:empID>
            			<ns1:empType>IT</ns1:empType>
            			<ns1:empName>Theo</ns1:empName>
        </ns1:process>
    </soap:Body>
</soap:Envelope>

Go to the console > soa_domain > SOA > soa-infra > > and Test it.
If we trigger the process 3 times with the payloads as we describes and in the same sequence, the instances will all complete and write the files to filesystem in the same sequence.

We used the ‘Standard’ mode and selected empID for sequence-value and emptType for group-value, and the sequence should start with 1 and will increment by 1.

Now switch the last 2 messages in the sequence and see what happens. Since we’re trying to process and already processed message again we will get the next errormessage

The selected operation execute could not be invoked.
An exception occured while invoking the webservice operation. Please see logs for more details.
oracle.sysman.emSDK.webservices.wsdlapi.SoapTestException: oracle.tip.mediator.infra.exception.MediatorException: ORAMED-03003:[Storing Resequencer Group Failed]Unable to store Resequencer Group." oracle.tip.mediator.common.persistence.MediatorResequencerMessage, mediator InstanceId=E07531315F8511DFBFBF3B164F19FDA3, componentDn=default/MyReSequence!1.0/Mediator1, operation=execute, groupId=IT, sequenceId=1, status=0"Possible Fix:Unable to store Resequencer Group. Check your Database connection or check data

So change all empType to ‘HR’ instead of ‘IT’.
For example

<soap:Envelope xmlns:soap="http://schemas.xmlsoap.org/soap/envelope/">
    	<soap:Body xmlns:ns1="http://xmlns.oracle.com/Application1_jws/MyReSequence/ProcessEmployees">
        		<ns1:process>
            			<ns1:empID>1</ns1:empID>
            			<ns1:empType>HR</ns1:empType>
            			<ns1:empName>Eric</ns1:empName>
        </ns1:process>
    </soap:Body>
</soap:Envelope>

The sequence we’re now going to use is empID=1, empID=3, empID=2

After sending the second message (empID=3), you will notice the instance won’t complete. Because the resequencer expects an empID=2. In this case it will wait till this message arrives.

<soap:Envelope xmlns:soap="http://schemas.xmlsoap.org/soap/envelope/">
    	<soap:Body xmlns:ns1="http://xmlns.oracle.com/Application1_jws/MyReSequence/ProcessEmployees">
        		<ns1:process>
            			<ns1:empID>2</ns1:empID>
            			<ns1:empType>HR</ns1:empType>
            			<ns1:empName>Eric</ns1:empName>
        </ns1:process>
    </soap:Body>
</soap:Envelope>


Now use the last test message (empID=2) and see what happens.

Instance 30030 changes from Running to Completed. This is because it received the next message in the sequence (empID=2), and after that the instance 30030 (empID=3) could continue.
If we check the files on filesystem we also see (compair the datetime of the files) that the files are stored in the correct sequence.

Other Resequencers

Besides the ‘Standard’ resequencer wel also have the ‘FIFO’- and the ‘BestEffort’ resequencer.
See this document to decide what resequencer suits best for your case.

Oracle Service Bus 11g, Using Custom Xpath functions

In the new Oracle Service Bus 11g, Oracle gives us new functionality for the use of custom xpath functions.
These functions we eventually can re-use in for example the xslt or xquery transformations.

For this we need :

  1. 1. XML Configuration file (osb-custom.xml)
  2. 2. Property file (optional, osb-custom.properties)
  3. 3. Custom Function Class (jar package)

All these files need to be stored at the next location

<OSB_HOME>/config/xpath-functions

1. XML Configuration file

Create a new XML configuration file. I made a copy of the default file, osb-built-in.xml, edit that one, and change the settings.

<?xml version="1.0" encoding="UTF-8"?>
<xpf:xpathFunctions xmlns:xpf="http://www.bea.com/wli/sb/xpath/config">
    <xpf:category id="%OSB_FUNCTIONS%">
        <xpf:function>
            <xpf:name>customConcat</xpf:name>
            <xpf:comment>%FUNC_CUSTOM_CONCAT_COMMENT%</xpf:comment>
            <xpf:namespaceURI>http://nl.iteye/osb/custom/functions/OsbUtils</xpf:namespaceURI>
            <xpf:className>nl.iteye.osb.custom.functions.OsbUtils</xpf:className>
            <xpf:method>java.lang.String customConcat(java.lang.String, java.lang.String)</xpf:method>
            <xpf:isDeterministic>false</xpf:isDeterministic>
            <xpf:scope>Pipeline</xpf:scope>
            <xpf:scope>SplitJoin</xpf:scope>
        </xpf:function>
    </xpf:category>
</xpf:xpathFunctions>

A few notes on this file.

  • category, the name of the category how it will appear in the IDE or Console
  • function:name,comments, the description of the function how it will appear in the IDE or Console
  • namespaceURI, the namespace which will be imported in for example the xquery to identify the custom function
  • className, the java implementation of our custom xpath function
  • method, the name of the method which we will be using for the implentation of the function
  • isDeterministic, A value of true or false declaring whether or not the function is deterministic, the XQuery standard recommends the function to be deterministic (see documentation for further information)
  • scope, i assume the scope of the OSB flow in which the function can be used

2. Property file

%OSB_FUNCTIONS%=Service Bus Functions
%FUNC_CUSTOM_CONCAT_COMMENT%=Returns the concat of the first and the second parameter

Not much in here,just a few placeholders for the descriptions

3. Custom Function Class

Create a new Java project in your favorite IDE. Create a new package and java class. For this demo i created a custom concat function which will concat parameter1 and parameter2 and return the result.

package nl.iteye.osb.custom.functions;       

public class OsbUtils {
    public OsbUtils() {
    }
    
    public static String customConcat(String firstParam, String secondParam) {
        return firstParam + " " + secondParam;
     }
}

The method needs to be defined as static.
Compile the code and create a jar archive and store this at the location mentioned in the top of the article.
After this we should have 3 extra files in this directory :

  • osb-custom.xml
  • osb-custom.properties
  • osb-custom.jar

Restart the server, so the Oracle Service Bus will load the custom classes we just created. Check the output of the console to see if don’t see any errors come by. Wrong configuration (wrong methodname,package, etc) will end up with a little stacktrace in here.

Testing

To test the custom xpath function, create a new Oracle Service Bus project in Eclipse.

Add new XML Schema

<?xml version="1.0" encoding="UTF-8"?>
<schema xmlns="http://www.w3.org/2001/XMLSchema" targetNamespace="http://www.example.org/NewXMLSchema" xmlns:tns="http://www.example.org/NewXMLSchema" elementFormDefault="qualified">
    <element name="Input" type="tns:InputType"></element>
    <element name="Output" type="string"></element>

    <complexType name="InputType">
    	<sequence>
    		<element name="Name1" type="string"></element>
    		<element name="Name2" type="string"></element>
    	</sequence>
    </complexType>
</schema>

Add new XQuery Transformation
In the list of expression functions we will see our custom function (customConcat)

(:: pragma bea:global-element-parameter parameter="$input1" element="ns0:Input" location="NewXMLSchema.xsd" ::)
(:: pragma bea:global-element-return element="ns0:Output" location="NewXMLSchema.xsd" ::)

declare namespace ns0 = "http://www.example.org/NewXMLSchema";
declare namespace xf = "http://tempuri.org/OSB%20Project%201/InputToOutput/";

declare function xf:InputToOutput($input1 as element(ns0:Input))
    as element(ns0:Output) {
        <ns0:Output>{ osbK3:customConcat($input1/ns0:Name1,$input1/ns0:Name2) }</ns0:Output>
};

declare variable $input1 as element(ns0:Input) external;

xf:InputToOutput($input1)

In the transformation i will map both the Name1 and Name2 to the input of the custom function, which will return the concat of both in output.

The easiest way to test the result is by running the XQuery on a connected server. Right mouseclick on the .xq file > Run As > Run on Server
The Oracle Service Bus Test Console will pop up.
Fill in the input data and execute.

And the result

Oracle SOA Suite 11g, Enable logging for EDN events

By default the logging for the events are turned off.

Connect to your DEV_SOAINFRA schema and execute :

DECLARE
  ENABLED NUMBER;
BEGIN
  ENABLED := 1;

  EDN_ENABLE_LOGGING(
    ENABLED => ENABLED
  );
END;

Trigger a new business event and select the logging in the ‘EDN_LOG_MESSAGES_TABLE’ (select * from edn_log_messages)

Oracle SOA Suite, Launch Message Flow Trace in Google Chrome

During testing of some of my composite applications i just couldn’t get the ‘Launch Message Flow Trace’ link showing the output (popup it seemed later on).
Chrome didn’t came up with the a blocking popup so it didn’t ring any bells.

Google Chrome > Options > Under the Hood > Content Settings > Pop-ups > and add your hostname to the exception list

Oracle ACE Award Invitation

Yesterday great news from the Oracle grounds, i received an invitation for the Oracle ACE Award!
I’m honored they give me this chance and i will continue my contribution to the Oracle Community.

The Oracle Ace Program

Oracle SOA Suite 11g, wrong settings after re-installation of SOA domain

During my installation of the 11g SOA Suite, things go bad once in a while and domains need to be created and removed, etc.

After last remove and new installation of my domain i got the next error message during startup of the Admin Server :

javax.transaction.SystemException: 
weblogic.transaction.loggingresource.LoggingResourceException: 
java.sql.SQLException: JDBC LLR, table verify failed for table 'WL_LLR_ADMINSERVER', row 
'JDBC LLR Domain//Server' record had unexpected value 'soa11g_new_domain//AdminServer' expected 
'soa_domain//AdminServer'*** ONLY the original domain and server that creates an LLR table
may access it ***

Easy fix would be :

Start sqlplus and connect to ‘DEV_SOAINFRA’ schema.

update WL_LLR_ADMINSERVER
set    RECORDSTR = 'soa_domain//AdminServer'
where  XIDSTR    = 'JDBC LLR Domain//Server';

commit;

Oracle Service Bus 11g, installation

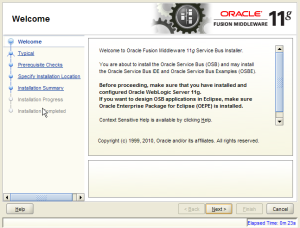
Besides the new patchset for Oracle SOA Suite 11g, Oracle also released the new Oracle Service Bus 11g.
See Edwin his list for the new features.

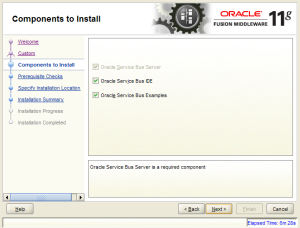
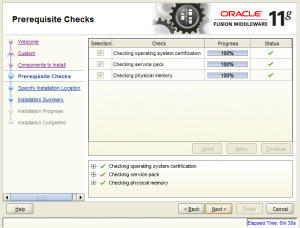
Download the installer and unpack the files and move the files from Disk2 to Disk1, otherwise the installation won’t complete.


Select the middleware home and we will create the new Oracle Service Bus Home in there.

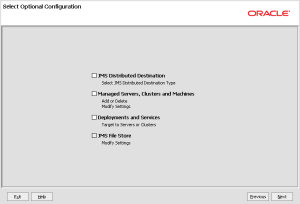
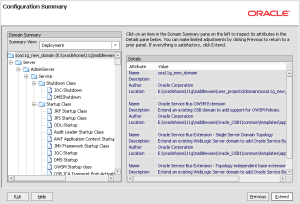
Configuration Wizard

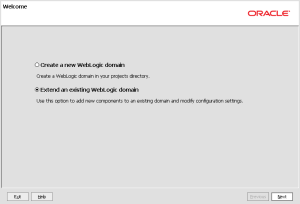
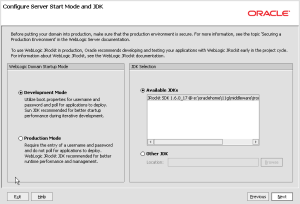
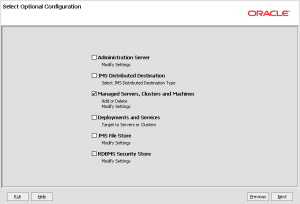
See this (2.10 Oracle Service Bus Domain Configuration Scenarios) overview to decide what the best infrastructure scenario is for your case. Since it’s my development machine i choose to reuse the SOA Suite domain to extend it with the Oracle Service Bus components. For this i won’t need an extra Weblogic domain.
I selected the Single Domain, since it will be installed on my dev machine. For production Oracle advises to use the All Domain Topologies. In that case Oracle Service Bus will be running in a seperate managed server (just like soa_server1 and bam_server1).

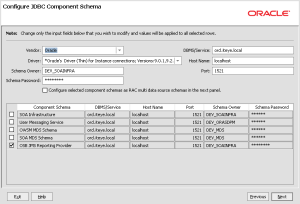
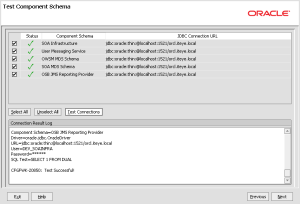
By default the credentials for the SOA Suite Components are already configurated correctly, we only need to change the ‘OSB JMS Reporting Provider’ component.

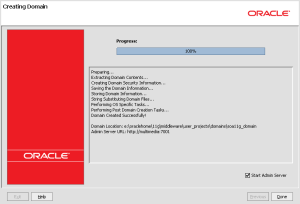
And we’re done.

Oracle Service Bus Console
http://localhost:7001/sbconsole (new Weblogic login screen)

See also Edwin his blog on the new WSM functionality (policies).

Oracle SOA Suite 11g Patch Set 2, installation

Once in a while i just clean my how Oracle environment and start from scratch which a clean one.

For this new installation i used the next set of installations

Loopback adapter

Optional installation of the Microsoft Loopback adapter (in case of dhcp)

Oracle Database 11g Release 2, Enterprise Edition

Follow the installation guide

*Note
Install the new db and update a few system parameters, otherwise the installation of the SOA Suite will fail

  • alter system set processes=500 scope=spfile;
  • alter system set open_cursors=500 scope=spfile;

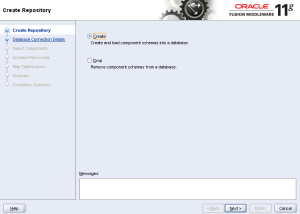
Repository Creation Utility

Run: rcuHome/bin/rcu.bat
Select the components you need and finish installation


WebLogic Server

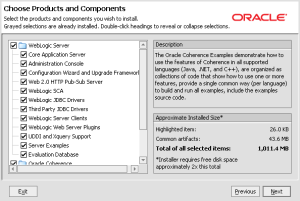
Run: wls1033_oepe111150_win32.exe
Create a new Middleware Home


SOA Suite

Oracle SOA Suite patchset1 was a fullblown new release. For the installation of the new patchset 2, we first need to install the patchset1 release.
Without it you will face the next message 😉

Run: Disk1/setup.exe (soa_11.1.1.2.0)
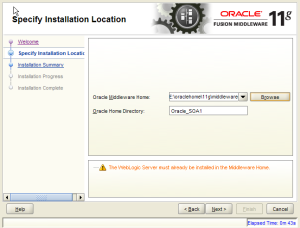
Select the Middleware Home we just created with the installation of Patchset 1


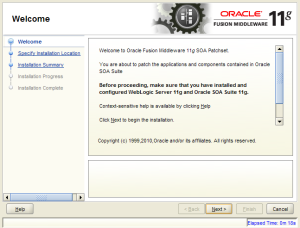
Run: Disk1/setup.exe (soa_11.1.1.3.0)


Configure Oracle SOA Suite

Run: middleware/wlserver_10.3/common/bin/config.exe
We’ll create a new weblogic domain for the soasuite components. Select the components you want to get installed in the domain, configurate database-settings and go.


Install Oracle Composite Editor for Jdeveloper

I use the manual install of the extension, but you can also update it fron within JDeveloper itself.
Help > Check for Updates > Source > Install From Local File, and Browse to the downloaded zip file, and your done.

*Note
If your Application Server Connection test fails in Jdeveloper, check if the proxy settings in Jdeveloper are correct. By default it’s turned on.
And that’s pretty much it of what’s needed for the installation of a new Oracle SOA Suite stack.